OUR SERVICES
Welcome to Our Services Page. We take pride in offering a diverse range of top-tier solutions designed to meet your unique needs. Our expert team, cutting-edge technology, and unwavering commitment to excellence ensure that we deliver exceptional results, making us your trusted partner for all your service requirements.

Non Destructive Testing (NDT)
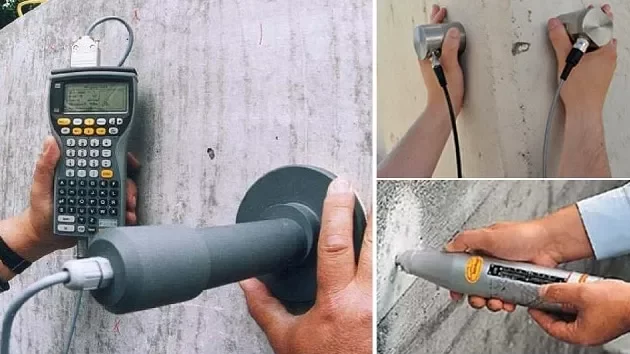
Nondestructive testing (NDT) is the process of inspecting, testing, or evaluating materials, components or assemblies for discontinuities, or differences in characteristics without destroying the serviceability of the part or system. In other words, when the inspection or test is completed the part can still be used.
Also known as MPI (Magnetic Particle Inspection). It is a method that can be used to find surface and near surface flaws in ferromagnetic materials such as steel and iron.
The technique uses the principle that magnetic lines of force {flux) will be distorted by the presence of a flaw in a manner that will reveal its presence. The flaw (for example, a crack) is located from the “flux leakage”, following the application of fine iron particles to the area under examination. There are variations in the way the magnetic field is applied, but they are all dependent on the above principle.
The iron particles can be applied dry or wet; suspended in a liquid, colored or fluorescent. While magnetic particle inspection is primarily used to find surface breaking flaws, it can also be used to locate sub-surface flaws. But its effectiveness quickly diminishes depending on the flaw depth and type.
Surface irregularities and scratches can give misleading indications. Therefore, it is necessary to ensure careful preparation of the surface before magnetic particle testing is undertaken.
Also known as Dye Penetrant Inspection (DPI), Liquid Penetrant Inspection (LPI) or Fluorescent Penetrant Inspection (FPI). It is a method that is used to reveal surface breaking flaws by bleed out of a colored or fluorescent dye from the flaw.
The technique is based on the ability of a liquid to be drawn into a “clean” surface breaking flaw by capillary action. After a period of penetration time, excess surface penetrant is removed and a developer applied. This ‘draws’ the penetrant from the flaw to reveal its presence. Color contrast (Or “visible”) penetrants require good white light while fluorescent penetrants need to be used in darkened conditions with an ultraviolet light (Also known as black light).
Penetrant inspection can be used on almost any non-porous material. It is essential that the material is carefully cleaned first. Otherwise, the penetrant will not be able to enter the defect. If surface penetrant is not fully removed, misleading indications will result.
Ultrasonic inspection uses sound waves of short wavelength and high frequency to detect flaws or measure material thickness. It is used to test welds, castings and wrought products, e.g. rolled plate or forgings. Manual and immersion techniques are employed.
Manual testing involves sound waves (pulsed beams of high frequency ultrasound) transmitted via a hand-held transducer, which is placed on the specimen. A ‘couplant’ is used to enable the sound to pass from the transducer to the component under test. Any sound from the pulse that returns to the transducer (echo) is shown on a screen, which gives the amplitude of the pulse and the time taken to return to the transducer. Flaws anywhere through the specimen thickness reflect the sound back to the transducer. Flaw size, distance and reflectivity can be interpreted.
The immersion technique involves placing the component in a tank of water and passing the sound waves through the water into the component.
Because of its complexity considerable technician training and skill is required.
Also known as x-radiography and gamma radiography. X-rays are produced by high voltage x-ray machines, whereas gamma rays are produced from radioactive isotopes such as Iridium 192 and Cobalt 60. The x-ray or gamma rays are placed close to the material to be inspected and they pass through the material and are then captured on film. This film is then processed and the image is obtained as a series of grey shades between black and white. Gamma sources have the advantage of portability which makes them ideal for use in site working.
X-rays and gamma rays are very hazardous. Special precautions must be taken when performing radiography. Therefore, the operator will use these inside a protective enclosure or with appropriate barriers and warning signals to ensure there are no hazards to personnel.
ET is an electromagnetic technique and can only be used on conductive materials. Its applications range from crack detection, to the rapid sorting of small components for flaws, size variations, or material variation. Commonly it is used in the aerospace, automotive, marine and manufacturing industries.
When an energized coil is brought near to the surface of a metal component, eddy currents are induced into the specimen. These currents set-up a magnetic field that tends to oppose the original magnetic field. The impedance of coil in close proximity to the specimen is affected by the presence of the induced eddy currents in the specimen.
When the eddy currents in the specimen are distorted by the presence of the flaws or material variations, the impedance in the coil is altered. This change is measured and displayed in a manner that indicates the type of flaw or material condition.
Also known as Visual Inspection, VT is the one NDT method used extensively to evaluate the condition or the quality of a weld or component. It is easily carried out, inexpensive and usually doesn’t require special equipment.
It is used for the inspection of welds and other components where quick detection and the correction of flaws or process related problems can result in significant cost savings. It is the primary evaluation method of many quality control programs.
VT requires good vision, good lighting and the knowledge of what to look for. Visual inspection can be enhanced by various methods ranging from low power magnifying glasses through to borescopes. These devices can also be used with television camera systems. Surface preparation can range from wiping with a cloth to blast cleaning and treating with chemicals to show the surface details.
It can identify where a failure is most likely to occur and identify when failure has commenced. VT is often enhanced by other methods of inspection which can identify defects that are not easily seen by the eye.
Cathodic Protection (CP) activities are essential to protect different structures from corrosion along with structure coating. According to the design concepts sacrificial CP system or impressed current CP system (ICCP) maybe used. All steel structures must be protected from corrosion by both efficient coating system and CP system
- Off shore structures (platforms, vessels, terminals and jetties, pipelines)
- On shore structures (pipelines, tanks, tank farm, well casing, refineries & petrochemical plants, power stations & desalination plants, steel in concrete, internal protection)
Our team of experienced technicians and engineers will provide you with the best advice
For more information, contact our experts to advise you on your specific project requirements.
